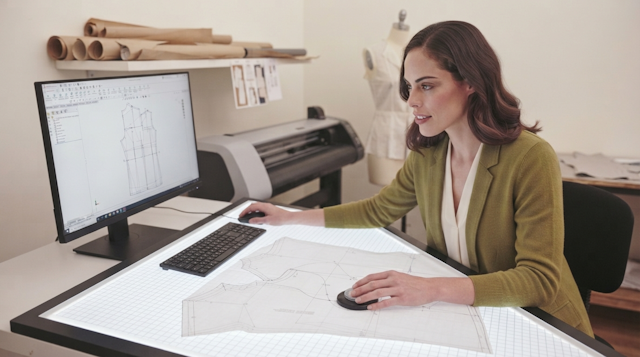
In an era of relentless apparel manufacturing digitization, archiving bulky cardboard rolls and yellowed paper patterns across workshop cabinets has become obsolete. Paper templates degrade over time, suffer seam-edge friction, warp under ambient humidity changes, and fail to accommodate dynamic multi-size scaling demands. Transitioning paper assets into vector-based CAD systems (Computer-Aided Design) is an imperative milestone for any growing fashion brand. How do you digitize manual blueprints with micro-metric precision?
- 1. Why Digitize Patterns: The Strategic Power of Apparel CAD
- 2. Digitization Methods: Electromagnetic Digitizer Boards vs. Photo Scanning
- 3. Industry CAD Software Compared: Grafis, Gerber, and Clo 3D
- 4. Integrating Digital Blueprints into the Cutting Room Flow
- CAD Engineer’s Advice: Optical Calibration to Prevent Lens Distortion
1. Why Digitize Patterns: The Strategic Power of Apparel CAD
Capital deployed into digitizing legacy pattern libraries delivers swift operational ROI across four key dimensions:
- Instant Anthropometric Size and Height Grading: In a vector environment, pattern makers avoid redrawing each size manually on graph paper. By establishing coordinate grading increments at key anchor points, the software computes an entire size range (e.g., US 2–18) in seconds.
- Geometric Invariance and Balance Retention: Vector blueprints experience zero physical wear. Armhole circumferences, sleeve cap heights, and registration notch distances maintain uncompromising mathematical precision.
- Automated Nesting and Yardage Savings: Integrated CAD marker-making engines nest pattern pieces tightly across designated fabric widths, trimming inter-pattern scrap by 5% to 8% compared to manual chalking. Over a 500-unit production run, this saves hundreds of meters of high-cost textile.
- Secure Cloud Redundancy and Instant Dispatch: Digital files cannot be scorched by pressing irons or ruined by machine lubricant spills. Stored in secure cloud vaults, production files dispatch to overseas partner factories within seconds.
2. Digitization Methods: Electromagnetic Digitizer Boards vs. Photo Scanning
Two primary technical methods translate physical geometry into editable vector paths:
Method 1: Coordinate Digitizer Boards:
- Hardware: A large A0+ format electromagnetic digitizing tablet. Cardboard pieces are taped flat, and an operator traces edges with an optical 16-button crosshair cursor, registering corners, curves, and alignment notches.
- Pros: Utmost metrological accuracy (margin of error under 0.2 mm) with zero optical lens distortion.
- Cons: High hardware cost, heavy desk footprint, and deliberate manual tracing.
Method 2: Optical Photo Digitizing:
- Hardware: The modern standard for agile apparel studios. Templates are laid on a high-contrast calibration mat equipped with metric grid lines and corner fiducials. A mounted high-resolution camera or smartphone captures the image, and computer-vision algorithms extract perimeter vectors and internal grainlines automatically.
- Pros: Ultra-rapid workflow (under one minute per piece) requiring minimal footprint.
If your label lacks time to vectorize legacy archives, acquiring verified digital bases is far more cost-effective. Discover production-grade patterns configured to precise sizing tables on Vykroyka.com.ua, bypassing manual digitizing overhead.
3. Industry CAD Software Compared: Grafis, Gerber, and Clo 3D
Software selection depends on operational scale and manufacturing focus:
- Grafis (Germany): Renowned for flexible parametric modeling. When base measurements change, dependent pattern blocks and multi-size gradations recalculate automatically.
- Gracia: Popular across Eastern Europe for fast, accessible pattern development and marker generation.
- Gerber Accumark / Lectra: Industrial manufacturing powerhouses dominating high-volume manufacturing. Their automated nesting algorithms (e.g., NestPro) maximize yield efficiency on mass production contracts.
- Clo 3D / Marvelous Designer: Next-generation 3D cloth simulation. Enables virtual stitching onto customized 3D avatars, validating structural tension and drape before cutting a single yard of sample fabric.
4. Integrating Digital Blueprints into the Cutting Room Flow
Translating digital pattern investments into factory-floor profitability requires streamlined hardware integration:
- Universal Export Protocols: Export finished markers in industry-standard formats — DXF-AAMA or PLT / HPGL. This ensures native compatibility with computer-controlled automated cutters (CAM) or large-format plotting machinery.
- Wide-Format Inkjet Plotters: Stationing a 160–180 cm wide plotter in the cutting room allows printing full-scale lay markers directly onto paper rolls within minutes. Operators simply overlay the plotted roll onto fabric lays and cut along crisp vector paths without manual chalking.
No Time for Manual Pattern Drafting and Archival Digitization?
Leverage validated digital sewing patterns from Vykroyka.com.ua: professional vector templates with multi-size gradations are ready for immediate plotter printing and cutting room export.
EXPLORE PATTERNS →