Standard ready-made patterns are designed for a conventionally typical figure with average fullness and basic posture. However, unique anatomical features—large breasts, a rounded back, or a protruding belly—often lead to creases, seam tension, and unbalanced garments. In this article, we will analyze in detail step-by-step techniques for correcting patterns, which will allow you to achieve the perfect fit of any shoulder or waist product without disturbing the design lines.
Contents of the article
- Why do you need to adjust the pattern and how to identify balance violations
- Correction of the bodice for large breasts (FBA method - Full Bust Adjustment)
- Back correction for stooping and round back
- Adaptation of trouser and skirt patterns for a figure with a tummy
- Tailor's advice: fitting on a model before cutting the main fabric
- Frequently asked questions (FAQ)
Why do you need to adjust the pattern and how to identify balance violations
If the finished pattern is selected strictly according to the chest girth (BC) size, but the difference between the girth above the chest and the girth at the protruding points exceeds 5-6 cm, the dress or jacket will pull at the armhole and bounce in the front. Likewise, stooping leads to a lumpy back and tension in the shoulder blades.
To determine the need for correction, compare your measurements with the measurements of the pattern table for four key parameters: Front Length to Waist (FW), Back Length to Waist (BW), Chest Height (BH) and Back Width (BW).
Correction of the bodice for large breasts (FBA method - Full Bust Adjustment)
The FBA method allows you to increase the volume of the shelf in the chest area without changing the length of the shoulder and the width of the armhole.
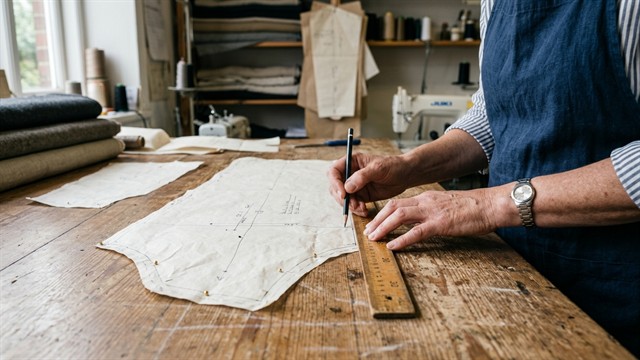
- Drawing construction lines: On the front part, draw a line through the center of the chest vertically down to the bottom, a second line - from the center of the chest to the armhole (at the level of the lower third), and a third - horizontally from the center of the chest to the side seam.
- Cutting the pattern: Cut the pattern along a vertical line from the bottom to the center of the chest and further to the armhole (not reaching the 1.5 mm cut of the armhole), and also along a horizontal line to the side seam.
- Expansion to the required amount:Extend the formed parts horizontally by the amount of increase in chest volume (for example, 2–4 cm). At the same time, the opening of the chest dart and waist dart will automatically increase.
- Bottom leveling: Lower the bottom edge of the shelf to the resulting difference, keeping it horizontal.
Back correction for stooping and round back
With a rounded back, the DST measurement is larger than the standard one, and the middle seam of the back requires additional convexity.
- Lengthening the back: Draw a horizontal line on the back parts at the level of the middle of the armhole (shoulder blades). Cut the pattern and spread the parts to the required size (1.5–3 cm).
- Design of the middle seam: Move the upper part of the middle back seam 0.7–1.5 cm to the right to create a natural bend to suit your posture.
- Designing a shoulder dart: If necessary, increase the opening of the shoulder dart or transfer part of the opening to the yoke or neckline.
Adaptation of trouser and skirt patterns for a figure with a tummy
Having a protruding belly causes the front halves of trousers or skirts to tighten and the front waistline to slide down. To avoid distortions when fitting at the waist, use patterns with a thoughtful belt, such as pattern of women's trousers BG001.
- Increasing the height of the seat and the width at the front:Make a horizontal cut on the front half of the trousers from the middle cut to the side (not reaching 2 mm to the side) at the level of the most protruding point of the abdomen. Extend the cut vertically by 1.5–2.5 cm.
- Expanding the front wedge:Add 1-2 cm along the middle seam (bow) in the front at the waist and smoothly bring the line to the hip line.
Tailor's advice
Always sewthe layout from calico or layout cottonfor complex items and non-standard shapes. Correcting a chintz layout with pins and a marker is much faster and safer than ruining the main expensive fabric. And proven ready-made patterns with an exact balance from our catalog will help you save time on basic design.
Frequently asked questions (FAQ)
What pattern size should I choose if OG corresponds to size 50 and OB to 46?
For shoulder items (dresses, blouses, jackets, such as pattern of a straight dress PG001) choose the size according to the chest girth or the girth above the chest (if you are planning FBA), and then smoothly bring the side seam to Size 46 at hip level.
Does the armhole length change after FBA?
When the FBA method is performed correctly, the length of the armhole remains virtually unchanged, since the pivot point is located at the very edge of the armhole cut, so there is no need to change the sleeve pattern.
How to adjust the pattern if the back, on the contrary, is too kinky?
In case of a bent posture, the back part is cut horizontally at waist level and a fold-over is inserted by 1–2 cm, reducing the DST measurement.
Expertly designed patterns are the key to a perfect fit of any product. To be the first to learn about the intricacies of design, modeling and trends in the sewing world, subscribe to our video channel Pattern - Ready-made patterns.