Accurate pattern cutting is more than half the battle in any successful sewing project. Even the most precise stitching cannot rescue a garment if the pieces were initially traced off-grain, distorted, or cut with uneven seam allowances. Here is the master tailor's guide to preparing your yardage, securing patterns securely, and transferring every marking flawlessly onto fabric.
1. Fabric Preparation & Preshrinking (Decatizing)
Before laying out paper pattern pieces, natural fabrics must undergo thorough preshrinking (decatizing) to prevent unexpected shrinkage after the first wash:
- Natural plant fibers (cotton, linen, hemp): soak in warm water matching your planned wash temperature (30–40°C), press out moisture gently without wringing, line-dry until slightly damp, and press thoroughly with steam along the lengthwise grain;
- Rayon, viscose & silk: delicate fibers should not be exposed to sudden temperature shocks. Spritz evenly with a fine water mist, roll in a dry terry towel for 20 minutes, and press through a dry cotton press cloth;
- Wools & tailoring suitings: steam generously using an iron hovered just above the fabric with a damp press cloth, avoiding heavy downward pressure to prevent iron shine;
- Knits & jerseys: unroll and lay flat on your cutting table for 2–3 hours to allow internal industrial winding tension to relax before pinning.
2. Proven Methods for Securing Patterns to Fabric
Keep your pattern pieces immovably flat during marking and cutting by selecting the right holding method for your fabric weight:
- Dressmaker pins: the classic approach. Pin perpendicular to the cutting lines every 10–15 cm (4–6 in), keeping pin heads within the pattern perimeter without buckling the paper;
- Pattern weights: the premier choice for slippery silks, chiffons, rayons, and lightweight jerseys, especially when using a rotary cutter. Dense metal or cloth weights keep patterns flat without making pin holes or snagging delicate weaves;
- Removable fabric glue stick or low-tack tape: indispensable for genuine leather, faux leather, suede, and waterproof coated fabrics where needle punctures cause permanent damage.
When cutting slippery silk, chiffon, or satin, lay a clean cotton bedsheet or wool blanket beneath your yardage on the cutting table. The subtle friction completely eliminates shifting while cutting.
3. Essential Pattern Tracing & Marking Tools
The sharpness and fidelity of your marked line determines final seam accuracy. Select the tool tailored to your textile:
- Tailor's chalk & wax chalk: classic and reliable. Always sharpen chalk edges with a craft knife to a razor-thin 0.5 mm line. Wax chalk grips wool suitings beautifully and vanishes completely under a hot steam iron;
- Dried sliver of bar soap: a timeless atelier technique. A paper-thin piece of bath soap glides smoothly over dark wools and washes away effortlessly with steam without residue;
- Disappearing / water-erasable markers: perfect for light-colored textiles. Lines fade naturally within 24–48 hours or erase instantly with cold water. Always test on scrap fabric first!
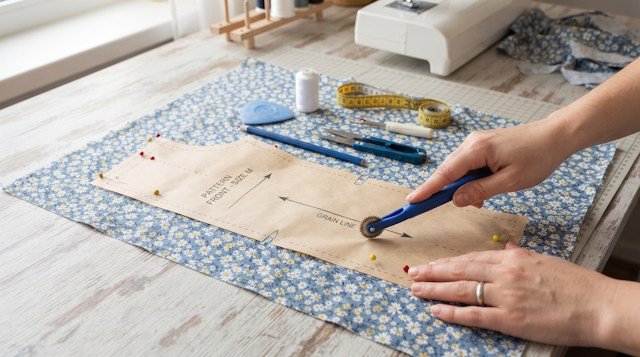
- Tracing wheel & dressmaker's carbon paper: the fastest way to mirror darts, pocket guidelines, and balance notches onto the underneath layer of fabric simultaneously.
4. Golden Rules for Precise and Economical Cutting
Following fundamental layout protocols saves expensive yardage and guarantees straight, non-twisting seams:
- Strict grainline alignment: the printed grainline arrow must run strictly parallel to the fabric selvedge. Measure from both ends of the arrow to the selvedge with a ruler to ensure matching distances down to the millimeter;
- Nap & directional prints: on velvet, corduroy, and napped wools, cut all pieces facing in the same directional flow (typically nap running down). For plaids and stripes, match crosswise bars across side seams;
- Calibrated seam allowances: if working with seam-free patterns, mark allowances consistently (1–1.5 cm for body seams, 0.7 cm for necklines/armholes, 3–4 cm for hem allowances);
- Rest shears on the table: when cutting with shears, keep the bottom blade gliding directly along the tabletop without lifting the fabric upward.
Ready to Sew with Flawless Professional Patterns?
Every pattern in the Vykroyka library features calibrated grainlines, assembly notches, and precise seam allowances for effortless cutting.
Browse Pattern Catalog