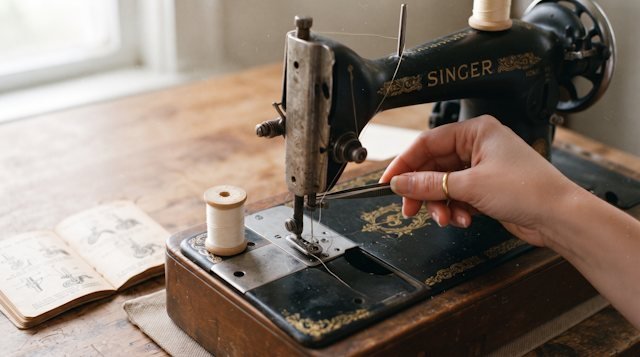
Properly threading your sewing machine is the cornerstone of smooth, trouble-free stitching. Overlooking even a single internal thread guide, missing the take-up lever, or threading while the presser foot is down inevitably leads to messy looped nests, thread breakage, and skipped stitches. In this comprehensive step-by-step guide for beginners, we explain how to set up both top and bobbin threads on modern household machines for flawless, professional seams.
Step 1. Winding and Inserting the Lower Bobbin Thread
The lower stitch interlocking relies on the bobbin thread inside the shuttle hook compartment. Uniform bobbin winding and correct placement directly dictate stitch tension stability.
- Even Bobbin Winding: seat your thread spool onto the spindle and secure it with an appropriately sized spool cap. Guide the thread around the pretension disc on the machine top, feed the thread end from the inside through the small hole in the bobbin rim, and wrap 3–4 turns by hand. Snap the bobbin onto the winder spindle, push it to the right, and depress the foot pedal steadily. The thread must build up smoothly without ridges or loose loops. Wind until 80–90% full, never spilling over the rims;
- Drop-In (Top-Loading) Shuttle: remove the clear slide cover. Drop the bobbin into the basket so that the thread unwinds in a counterclockwise direction (resembling the letter "P"). Guide the thread through the front slit, pull it firmly to the left under the leaf spring tension clip, and route toward the thread cutter;
- Front-Loading (Oscillating) Shuttle: open the hinged hook cover in the free-arm base. Place the bobbin into the metal bobbin case, pull the thread into the side slit, and snap it under the tension spring. Insert the case into the center axle until the latch finger clicks into the top notch with an audible snap.
Step 2. Threading the Upper Path (Crucial Step)
Threading the top thread must follow a precise mechanical pathway.
- Raise Critical Assemblies: turn the handwheel toward yourself until both the needle bar and the silver take-up lever reach their apex. Always raise the presser foot lifter!;
- Spool Positioning: seat the thread spool onto the pin with the correct spool cap to ensure unhindered unspooling without snagging;
- Tension Channel: guide the thread through the upper metal guide, bring it down the right vertical channel, loop around the bottom U-turn divider, and draw it up the left channel;
- Take-Up Lever: slip the thread into the eyelet of the take-up lever strictly from right to left, confirming the thread sits deep within the eye;
- Needle Bar Guides: route the thread straight down the left channel toward the needle clamp, snapping it behind the small wire guide above the needle;
- Needle Eye: insert the thread through the needle eye from front to back (or use the built-in automatic needle threader). Pull a 10–15 cm tail straight back beneath the presser foot.
Never thread the upper path with the presser foot lowered! When lowered, internal tension discs are clamped firmly together by their spring. Thread will skate over the discs instead of slipping between them. Upon the first stitch, lower tension drops to zero, creating a bird's nest knot underneath that jams the machine instantly.
Step 3. Drawing Up the Lower Bobbin Thread
Before positioning fabric, draw the lower bobbin thread to the surface of the throat plate:
- Gently hold the top needle thread tail in your left hand with light tension;
- With your right hand, rotate the handwheel one full turn toward yourself. The needle will dip into the hook race, pick up the bobbin thread loop, and rise back to its summit;
- Gently tug the needle thread — a loop of bobbin thread will emerge through the needle hole;
- Use tweezers, a seam ripper, or scissor tips to pull the loop completely free;
- Sweep both thread tails (upper and bobbin) back beneath the presser foot. Your machine is completely set up and primed for flawless stitching!
Sew with Joy Using Precision Patterns!
Browse the Vykroyka catalog for professional digital sewing patterns featuring detailed illustrated construction guides.
Explore Pattern Catalog