Processing complex fittings and slotted units is the main indicator of professionalism in sewing. A hidden zipper, installed without shifting the seams, and a neat welt pocket “in the frame” with even corners often cause fear among novice craftswomen. In this step-by-step master class, we will analyze in detail the couture technology of performing these two basic operations, which will make your dresses, skirts and trousers flawless both outside and inside.
Contents of the master class
- Part 1. Step-by-step technology for sewing in a hidden zipper
- Step 1. Duplicating and preparing allowances
- Step 2. Basting and positioning the fastener
- Step 3. Stitching with a special foot
- Part 2. Processing a welt pocket with a frame
- Step 1. Marking and duplicating the entrance to the pocket
- Step 2. Preparation and grinding of facings
- Step 3. Cutting the entrance, straightening the corners and assembling the burlap
- Tailor's advice: how to avoid creases and waves on fabric
- Frequently asked questions (FAQ)
Part 1. Step-by-step technology for sewing in a hidden zipper
The main secret of a hidden zipper is that the stitching should run close to the spiral, but not overlap it, so that the slider moves freely.
Step 1. Duplicating and preparing seam allowances
The seam allowances at the place where the zipper is sewn in (1.5–2 cm wide) must be reinforced with a thin thread-stitched adhesive tape or a strip of non-woven fabric. This prevents the fabric from stretching, especially on bias cuts and knits.
Step 2: Basting and Positioning the Fastener
- Open the zipper and iron it from the wrong side at a moderate temperature, slightly bending the spiral with your fingers.
- Place the zipper tape right side to the right side of the fabric allowance so that the teeth line up with the marked seam line.
- Baste or pin the zipper tape across the stitching direction. The top zipper stop should be 1.5 cm below the neckline or waistband.
Step 3. Stitching with a special foot
Install aspecial foot for a hidden zipper(with grooves on the sole). Bend the zipper spiral with your finger and place it in the groove of the foot. Stitch from top to bottom to the runner. Repeat the operation for the second side of the fastener. Finally, close the bottom seam under the zipper using a standard single-arm foot.
Part 2. Processing a welt pocket with a frame
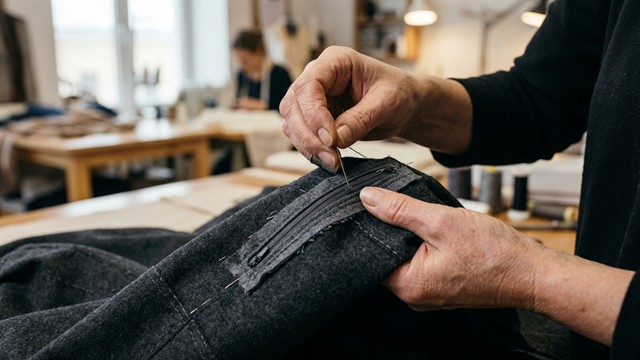
A framed pocket (with one or two facings) requires pinpoint precision when marking and cutting the fabric.
Step 1. Marking and duplicating the entrance to the pocket
On the wrong side of the main part, duplicate the pocket area with a piece of adhesive material (1.5–2 cm larger than the pocket itself on each side). On the front side, using chalk or running stitches, mark the entry rectangle: pocket length (usually 13–15 cm), frame width (1–1.5 cm for two facings).
Step 2. Preparation and grinding of facings
- Prepare two facings from the main fabric, duplicate them and iron them in half lengthwise with the wrong side inward.
- Place the facings with folds to the center of the marked rectangle on the front side of the product.
- Stitch the facings strictly along the outlined lines of the frame. Important: The lines must be perfectly parallel and start/end exactly at the same level.
Step 3: Cutting the entrance, straightening the corners and assembling the burlap
Cut the entrance to the pocket from the wrong side in the middle between the lines, not reaching 1–1.5 cm from the ends of the pocket. Next, make inclined notches to the corners of the stitches, not reaching the 1 mm thread (“corner”). Turn the facings right side out, straighten the frame and secure the resulting triangular corners with a stitch along the wrong side. Sew the pocket burlap pieces and secure them around the perimeter.
Tailor's advice
The main reason for “filled up” corners in a pocket is a sloppy cut of the “corner”. Usevery sharp tailor's scissors with fine tipsand trim the fabric exactly to the last stitch, without cutting the seam itself. And proven ready-made patterns from our catalog will help you hone your skills and sew a jacket, trousers or coat of the perfect cut.
Frequently asked questions (FAQ)
Why does a hidden zipper come apart or “stick” when fastened?
If the zipper sticks, it means the stitching is too close to the spiral and is catching the fabric. If the braid is visible from the front side, the stitching is laid too far from the spiral. Use the correct presser foot with guide grooves.
Which fabric is best to cut out pocket burlap from?
For products made from thick or coat fabrics, burlap is cut out from lining fabric (silk, viscose) to avoid excess thickness and volume on the figure.
Is it possible to sew a hidden zipper without a special foot?
You can use a standard single-horn zipper foot, but to do this you will have to bend the spiral by hand. The result may be less neat, so a special presser foot is highly recommended.
Expertly designed patterns are the key to a perfect fit of any product. To be the first to learn about the intricacies of design, modeling and trends in the sewing world, subscribe to our video channel Pattern - Ready-made patterns.