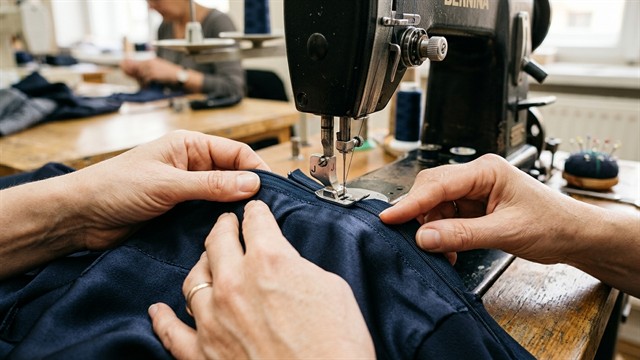
Processing a hidden zipper in products with a lining often causes difficulties for craftswomen: the locking braid can bristle, warp the seam or get under the slider when fastening. In this master class we will analyze a clean industrial method of stitching a hidden zipper, which ensures a perfectly smooth seam on the front side and an aesthetically sealed back side without visible allowances.
Contents of the article
- Preparing parts and choosing a zipper
- Step 1: Duplicating the seam allowances and sewing the zipper into the main fabric
- Step 2: Stitching the Lining to the Zipper Tape
- Step 3: Connecting the middle seam and final fastening
- Tailor's advice: the secret to an even seam without creases or waves
- Frequently asked questions (FAQ)
Preparing parts and choosing a zipper
To work, you will need: a hidden zipper with a plastic spiral (3-5 cm longer than the length of the cut), a special single-arm or foot for a hidden zipper, as well as strips of thin adhesive dublerin 1.5-2 cm wide.
- Choice of a zipper: The length of the fastener should freely allow the passage of the hips or shoulder girdle (for dresses, usually 50-60 cm, for skirts - 20-25 cm).
- Spiral quality: The zipper teeth should be easy to turn with your finger when stitching.
Step 1: Duplicate the seam allowances and sew the zipper into the main fabric
Iron strips of dublerin to the seam allowances of the main fabric along the zipper sewing area. This will prevent the fabric from stretching and protect the seam from waviness.
- Open the zipper and bend the teeth with your finger.
- Put the zipper tape right side to the right side of the main fabric seam allowance, aligning the teeth with the marked seam line (1.5 cm from the edge).
- Stitchusing a special zipper foot, which pushes back the spiral and places the needle directly against the teeth without stepping on them. Repeat the operation for the second side.
Step 2: Stitching the Lining to the Zipper Tape
The main secret of the “clean” method is covering the inside of the zipper with a lining (clean packaging).
Place the lining right side on the right side of the product, going around the zipper tape from top to bottom. Sew the lining to the seam allowance along with the zipper tape, placing the stitch 2-3mm further from the spiral than the first stitch. This is necessary so that the lining does not get into the runner when fastening.
Step 3: Connecting the middle seam and final fastening
Close the zipper. Fold the piece below the end of the fastener with the right side facing in, moving the bottom tail of the zipper toward the seam allowance.
Place a stitch along the middle seam from the bottom of the product strictly to the point where the zipper is inserted, overlapping the beginning of the first stitch by 1-2 mm. Press the seam allowances open and secure the bottom ends of the zipper to the lining seam allowances.
Tailor's advice
To ensure that transverse seams (for example, a seam at the waist or waistband) strictly meet at the same level on both sides of the zipper, before sewing in the second sidemake small control notches on the zipper tape exactly opposite the seam of the beltattachment. Checked ready-made patterns from our catalog will help you calculate allowances and sew a dress with a perfect fit.
Frequently asked questions (FAQ)
Why does a hidden zipper bulge in waves after sewing in?
The main reason is the lack of duplication of allowances with an adhesive strip before work or too much tension in the fabric when stitching.
What to do if the slider gets stuck in the lining fabric?
The line for sewing the lining to the zipper should be at a distance of 2–3 mm from the spiral. If you sew the lining too close to the teeth, the fabric will chew on the runner.
Do I need to iron the zipper before sewing?
Yes, before work, it is recommended to gently straighten and lightly iron the zipper spiral with a warm iron from the wrong side to unwind the teeth for easy passage of the presser foot.
Expertly designed patterns are the key to a perfect fit of any product. To be the first to learn about the intricacies of design, modeling and trends in the sewing world, subscribe to our video channel Pattern - Ready-made patterns.