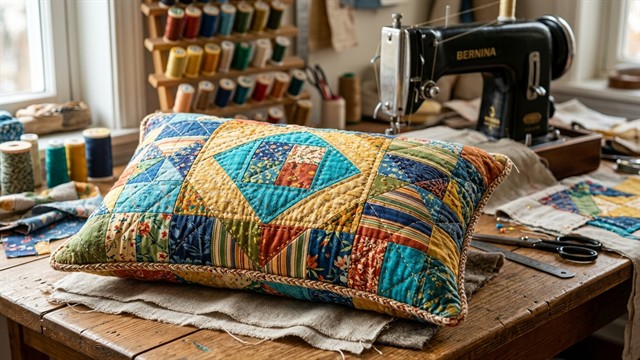
Patchwork is not only a fascinating type of needlework, but also a great way to give new life to beautiful scraps of fabric left over from sewing clothes. Making a decorative pillow out of squares is the perfect place to start for beginners: the simple geometric cut makes it easy to learn the basic techniques of joining blocks, precisely joining seams and stitching. In this step-by-step master class we will walk through the entire process from cutting to assembling the finished product.
Contents of the article
- Materials and tools for work
- Step 1: Calculation of dimensions and correct cutting of parts
- Step 2: Assembling the patchwork and joining the corners
- Step 3: Stitching the top layer and assembling the pillowcase with clasp
- Tailor's advice: the secret to perfect seam matches
- Frequently asked questions (FAQ)
Materials and tools for work
To create a patchwork pillow measuring 40x40 cm, you will need: 3-4 types of cotton fabric with harmonizing prints or monochrome shades, thick fabric for the back of the pillowcase, thin synthetic padding or slimtex for lining, lining fabric, a cutting knife and mat (or sharp tailor's scissors), as well as a hidden zipper 35-40 cm long.
- Fabric for patchwork: It is best to use 100% cotton fabric (calico, poplin, special cotton for patchwork) - it does not slip when sewing and does not shrink strongly.
- Threads: Durable cotton or universal polyester threads to match the main color scheme.
- Tools: Patchwork ruler, tailor's pins and steam iron.
Step 1: Calculation of dimensions and correct cutting of parts
For the front side of the pillow 40x40 cm we will make a pattern of 16 squares (grid 4x4 blocks). The finished size of each square in the block is 10x10 cm.
- Size with seam allowances:Add 0.75cm seam allowance on each side (standard patchwork foot width) to the block size. Cut out squares measuring11.5 × 11.5 cm.
- Quantity: Cut out 16 squares in total (4 pieces of each of the 4 selected types of fabric).
- Padding and back: Cut out a square of padding polyester and lining measuring 43x43 cm, as well as two pieces for the back of the pillowcase.
Step 2: Assembling the patchwork and joining the corners
Lay out the cut out squares on the table, choosing the most harmonious pattern and alternation of colors.
Sew the pieces sequentially in rows: first sew the squares into 4 horizontal stripes of 4 pieces each. Press the seam allowances on the first and third rows to the right, and on the second and fourth rows to the left (this will prevent thickening where the seams intersect).
Then fold the strips right sides together, secure the joints of the corners with pins into a lock and stitch the strips into a single patchwork fabric. Carefully press all seam allowances.
Step 3: Stitch the top layer and assemble the pillowcase with clasp
Fold a “sandwich”: lining fabric on the bottom, padding polyester in the middle, finished patchwork on top. Pin all layers together using clasp pins from the center outwards.
Place a decorative stitch on your machine along the seams (“in the groove”) or diagonally across the squares. Trim the protruding edges of the padding and lining to the size of the patchwork top.
Sew a hidden zipper into the bottom seam between the front and back sides of the pillowcase, fold the pieces right sides inward with the zipper open, and stitch around the perimeter. Turn the pillow inside out and straighten the corners.
Tailor's advice
The main guarantee of a neat patchwork isstrict adherence to the same width of the seam allowance (0.75 cm) on each seam. Use a special patchwork foot with a guide or place a strip of masking tape on the needle plate of the machine at the desired distance. Checked ready-made patterns from our catalog will help you complement the interior and sew beautiful furniture covers.
Frequently asked questions (FAQ)
Do I need to decorate and wash the fabric before cutting the flaps?
Yes! Cotton fabrics must be washed or ironed generously with steam (decat) before cutting, otherwise after the first wash of the finished pillow the blocks will shrink differently and the fabric will warp.
Which seal is best to use for a decorative pillow?
For volumetric stitching, thin padding polyester with a density of 100 g/m² or slimtex is excellent. If you want to make a dense wall hanging or runner, use cotton quilting filler.
How to cut cotton squares evenly without a rotary cutter?
Make an exact template in advance from thick cardboard or plastic measuring 11.5x11.5 cm, trace it with a sharp pencil from the inside of the fabric and cut it out with sharp tailor's scissors.
Expertly designed patterns are the key to a perfect fit of any product. To be the first to learn about the intricacies of design, modeling and trends in the sewing world, subscribe to our video channel Pattern - Ready-made patterns.