The perfect trouser length is the defining detail that elevates any tailored look. While casual jeans or sweatpants can be hemmed on a sewing machine in minutes, formal wool trousers, designer suits, and creased trousers demand a hand-stitched finish. An exquisite blind stitch makes the hem completely invisible from the right side, maintaining the soft drape and elegance of the garment.
- Trousers with properly fitted and pinned length;
- Tailor's pins, fine tailor's chalk or disappearing fabric marker, fabric shears;
- Fine hand-sewing needle (size 7–9) and high-quality thread strictly matched to the fabric;
- Steam iron, tailor's wooden clapper, and cotton press cloth.
Step 1. Fitting and Marking Trouser Length
A flawless hem begins with an accurate fitting. Always try on the trousers while wearing the shoes you intend to pair with them, as sole height significantly changes the break over the footwear:
- Stand upright in front of a full-length mirror without bending forward (to avoid pulling the waistband out of place);
- Fold the hem to the wrong side to the desired length (standard tailored hem allowance is 3 to 4 cm / 1.25–1.5 inches) and pin securely;
- Verify symmetry across the front, back, and side seams. For classic trousers, aim for a slight single break at the front and a back hem sitting approximately 1–1.5 cm above the shoe heel.
Step 2. Trimming and Pressing the Hem Allowance
Remove the trousers and spread them out flat on your cutting table. Mark a sharp continuous fold line with tailor's chalk along the pins:
- Measure down a consistent hem allowance (3.5–4 cm / 1.5 inches) and trim away excess fabric;
- Finish the raw edge using a serger or narrow zigzag stitch (for fine wools, a silk bias tape binding offers couture elegance);
- Fold the hem allowance to the inside along the marked crease and press thoroughly with steam through a press cloth. Clamp with a wooden tailor's clapper until cooled.
Step 3. Hand Blind Stitch Technique
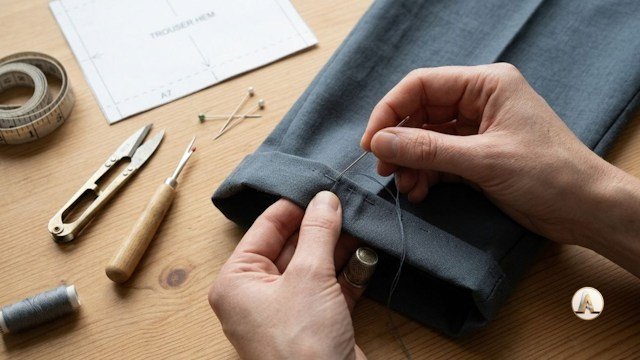
Thread a fine needle with a single strand of thread (approximately 45–50 cm / 18 inches long). Double threads or overly long strands tend to knot and cause visible ridges. Tie a delicate knot at the end:
- Peel the top edge of the hem allowance slightly toward yourself to expose the valley between the hem and the pant leg;
- Conceal your starting knot inside the folded seam allowance near the inner leg seam;
- Catch just 1 to 2 threads of the main outer fabric with the tip of the needle, ensuring the needle never pierces through to the visible right side;
- Take a small diagonal bite through the serged edge of the hem allowance;
- Work around the circumference from right to left with stitches spaced 5–7 mm (1/4 inch) apart.
The golden rule of hand blind hemming is relaxed tension. Never pull the thread tight. The stitches should float gently within the fabric weave. If you tug too firmly, tiny dimples and dimpled puckers will instantly show up on the face of the garment.
Step 4. Final Ironing and Steam Shaping
Once you finish the circumference, anchor the thread with a tiny double knot inside the hem allowance. Proceed to the final press:
- Slide the pant leg over a sleeve board or align it flat along the trouser creases;
- Steam-press the hem from both the inside and outside through a damp press cloth;
- The steam will relax the fibers, embedding the fine thread seamlessly into the fabric weave;
- Let the trousers rest flat for 10–15 minutes to cool and set their shape before placing on a hanger.
Looking for Precise Trouser Sewing Patterns?
Browse our pattern library for tailored, wide-leg, palazzo, and tapered trousers complete with calibrated seam allowances.
Browse Pattern Catalog