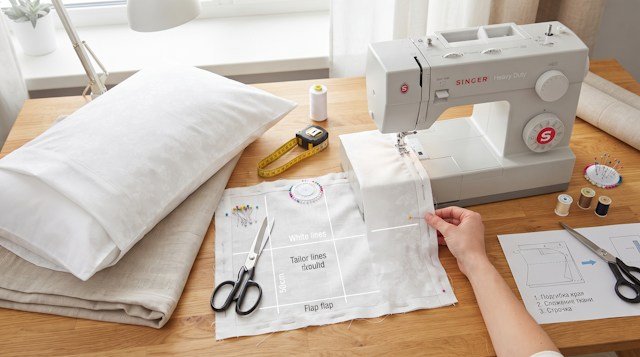
Sewing home textiles is a wonderful way to quickly refresh your bedroom interior and the ideal starting project for anyone learning to sew. The classic envelope pillowcase (with an inner flap) is among the most popular bedding designs: it requires no tricky zippers or buttonholes, takes just 20 minutes to complete, and is effortlessly durable in everyday use. Here is a step-by-step masterclass on calculating yardage and sewing a crisp, professional envelope pillowcase by hand and machine.
- Cotton fabric cut (natural calico, percale, poplin, or sateen at least 150 cm wide);
- Measuring tape, tailor's chalk or fabric marker, fabric shears;
- Sewing pins and a reliable steam iron;
- Sewing machine and high-quality thread matched to the fabric.
Fabric Size Calculation (50x70 cm Standard Pillow)
Before cutting, always pre-wash cotton fabrics at 30–40°C or thoroughly steam-press (decatize), as 100% natural cotton shrinks by approximately 3–5% in length and width.
Standard formula for cutting length with an integrated envelope flap:
- Cut Length: 70 cm + 70 cm (two main pillow faces) + 20 cm (internal envelope flap) + 5 cm (hemming allowances and residual shrinkage) = 165 cm.
- Cut Width: 50 cm (pillow width) + 3 cm (ease of fit plus 1.5 cm side seam allowances) = 53 cm.
- Final Rectangular Cut: exactly 53 × 165 cm per pillowcase.
Step 1. Hemming the Short Edges
Cut your rectangle cleanly along the grainline. The two short ends (53 cm wide) need double-folded narrow hems to prevent fraying through repeated laundry cycles:
- Lay the fabric wrong side up on your ironing board;
- Fold each short edge to the wrong side by 0.5 cm, then fold over again by 1 cm (clean-finished double hem);
- Steam-press the fold firmly and secure with pins;
- Stitch along the inner fold line, 1–2 mm from the edge;
- Repeat on the opposite short end.
Step 2. Folding and Forming the Envelope Flap
Spread the fabric right side up on a flat table. The envelope is created by folding the fabric into a self-enclosing pouch:
- Fold one hemmed edge inward, right sides together, exactly 70 cm (matching finished pillow length);
- Fold the second hemmed end (the flap) inward by 20 cm, overlapping the first folded piece;
- You now have a compact 53 × 70 cm rectangle with the wrong sides of the fabric facing outward.
Make sure the overlapping envelope flap sits completely square and flat without twisting. Pin securely along both raw side edges with pins positioned perpendicular to the raw edge for smooth feeding under the presser foot.
Step 3. Stitching and Finishing Side Seams
Sew straight seams along both open side edges with a 1 cm (3/8 in) seam allowance:
- Backstitch securely (3–4 reverse stitches) at the beginning and end of each seam, reinforcing the high-stress junction where the envelope flap overlaps;
- Finish raw seam edges with a serger or sewing machine zigzag stitch;
- Clip the corners diagonally at 45° close to the stitching line without cutting into the thread to reduce bulk.
Step 4. Final Turning and Steam Pressing
Turn the pillowcase right side out through the envelope opening. Using a point turner or wooden stick, gently push out all four corners from the inside:
- Roll the side seams flat between your fingers;
- Steam-press the entire pillowcase crisply from both sides;
- Allow the fabric to cool flat—your handcrafted pillowcase is complete and ready for use!
Sewing Comfortable Loungewear & Home Linens?
Browse our pattern library for pajamas, robes, loungewear, and home sewing projects with calibrated seam allowances.
Browse Pattern Catalog