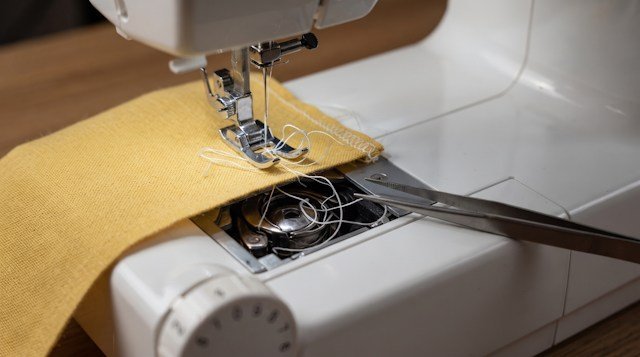
One of the most discouraging issues when sewing is discovering that while your topstitching looks picture-perfect, the underside of your fabric has turned into a tangled bird's nest of loose thread loops, knots, and snarls. This cluster puckers the seam and can jam the shuttle hook completely. Here is a definitive, step-by-step troubleshooting guide explaining why your sewing machine is looping thread underneath and how to fix birdnesting in under two minutes.
1. Incorrect Upper Threading (The Culprit in 90% of Cases)
The great golden paradox of sewing machine mechanics that catches beginner sewists off guard: loops underneath the fabric are caused by the UPPER thread, not the bobbin thread! When the upper spool lacks proper tension, it falls loosely beneath the needle plate, allowing the bobbin hook to pull excessive slack into clusters of loops:
- Threading with the presser foot down: if you thread your machine while the presser foot is lowered, the internal tension discs are clamped shut. The thread rides along the outer edge rather than seating inside the discs, resulting in zero tension;
- What to do: raise the presser foot all the way up. Unthread the upper thread completely and rethread slowly, ensuring every guide and hook is engaged;
- Take-up lever check: verify that the thread passes through the eyelet of the metal take-up lever (the arm moving up and down). If missed, loop clearance fails completely;
- Tension pull test: lower the presser foot and pull the thread through the needle eye. You should feel firm, smooth resistance. When the foot is raised, it must glide completely free.
Remember this essential troubleshooting guideline: if loops, tangles, or knots appear on the UNDERSIDE of the fabric, the issue is almost always with the UPPER thread. If loops show on the TOP of the seam, the issue is with your BOBBIN thread.
2. Unlatched Bobbin Cover & Lint Buildup in Shuttle Race
In modern drop-in top-loading horizontal hook machines, consistent lower tension depends on proper bobbin positioning:
- Bobbin cover plate: if the clear plastic cover plate is not securely clicked shut, the bobbin jumps upward when thread tension engages, popping out of its tension spring;
- Unwinding direction: in drop-in bobbins, thread must unwind counter-clockwise, forming the shape of a letter "P". Pull the thread through the notched guide channel until you feel it click into the tension leaf;
- Lint & debris: lint compressed beneath the bobbin basket prevents the upper thread loop from sweeping freely around the shuttle. Clear out lint with a stiff brush.
3. Imbalance in Upper vs. Lower Thread Tension
If rethreading with the presser foot raised leaves minor bottom looping, fine-tune the tension dial balance:
- Default dial settings: on most standard domestic machines, the upper tension dial should be set between 3.5 and 4.5 (or the "Auto" marking);
- Tension adjustment: if thread still loops beneath, increase the upper dial number by half a step (e.g., from 4 to 4.5 or 5);
- Front-loading bobbin cases: for metal bobbin cases, perform the drop test. Hold the thread tail with the bobbin suspended; it should stay suspended and drop slightly only with a deliberate flick of the wrist.
4. Thread Weight Mismatches and Poor Bobbin Winding
Discrepancies in thread diameter between upper and lower feeds unbalance seam mechanics:
- Heavy topstitching thread: never wind heavy topstitching thread (No. 30) into the bobbin. Use regular sewing thread (No. 40 or 50) in the bobbin and heavy thread solely on top;
- Uneven bobbin winding: hand-wound or loosely wound bobbins feed with erratic drag, triggering intermittent bursts of looping;
- Thread quality: always standardize on smooth, bonded 100% polyester thread from trusted brands (Gutermann, Coats, Madeira).
Sew with Joy Using Flawless Patterns!
Discover the Vykroyka pattern collection crafted with precise technical instructions for effortless stitching.
Browse Pattern Catalog