One of the most frustrating challenges when constructing garments is discovering puckered, wavy seams that distort the fabric into unsightly ridges. This issue is particularly frequent when sewing delicate, lightweight fabrics such as silk, chiffon, batiste, and rayon, or when stitching fine hems on stretch jersey. In this comprehensive guide, we dissect the four mechanical causes behind seam puckering and outline actionable adjustments to produce flat, professional stitches every time.
1. Excessive Needle or Bobbin Thread Tension
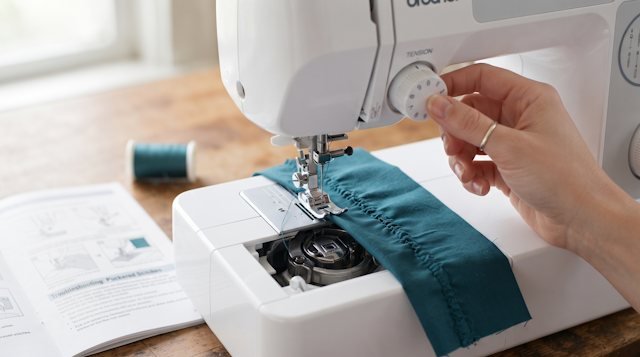
Tight thread tension is the classic source of seam puckering. When threads are drawn too taut through tension discs, they behave like stretched elastic bands: they extend slightly as the stitch is formed, then recoil after interlocking, bunching the flexible textile yarns into visible ripples.
- Adjust Upper Tension: decrease the upper tension dial by 1 to 2 increments (for instance, dropping from 5 down to 3.5–4). Aim for stitch interlocking perfectly centered between fabric plies, with no thread knots poking through either side;
- Smooth Spool Unwinding: confirm the spool spins freely without snagging on spool rim notches or defective spool caps, which creates intermittent friction spikes;
- Bobbin Case Tension: if puckering is concentrated on the fabric underside, loosen the bobbin case tension screw (on front-loading vertical oscillating shuttles) by turning it counterclockwise just 1/8 of a turn with a precision screwdriver.
2. Needle and Thread Size Mismatched to Fabric
Employing a heavy needle and coarse thread on sheer textiles causes structural displacement puckering. A thick needle blunt-forces fabric weave apart instead of sliding smoothly between threads, while bulky thread wedges yarn strands permanently apart along the seam line.
- Select Ultra-Fine Needles: for silk, chiffon, organza, and voile, switch to acute Microtex (sharp) needles in size 60/8 or 70/10. Their slim shaft and keen point penetrate tightly woven fibers without snagging;
- Fine, High-Tenacity Thread: substitute standard 40 wt polyester with fine 60 to 80 wt continuous-filament polyester or specialized extra-fine sewing thread designed for lightweight apparel.
3. Excessive Presser Foot Pressure
When the presser spring bears down too firmly on slippery or fine fabrics, feed differential occurs: the bottom feed dogs advance the lower ply normally, while the soleplate drags the upper layer back. The unequal feed forces excess fabric between stitches, generating permanent waves.
- Lighten Foot Pressure: if your machine features an adjustable presser foot dial or screw, reduce pressure setting to light when sewing delicate or slippery synthetics;
- Install a Walking Foot: on machines with fixed presser tension, attach an even-feed walking foot. It advances top and bottom fabric plies simultaneously at identical speed;
- Tear-Away Stabilizer: place strips of lightweight tissue paper, tear-away stabilizer, or wash-away film underneath difficult seams. The backing prevents feed dog teeth from pulling the fabric into the throat hole, and tears away cleanly afterward.
4. Incorrect or Overly Short Stitch Length
An overly dense stitch length (under 2 mm) acts like postage stamp perforation, cramming too much thread volume into limited weave space. The crowded stitches displace yarns, buckling the seam.
- Optimal Stitch Length: increase stitch length to 2.5–3.0 mm for standard dressmaking woven fabrics;
- Knit Elasticity: for jerseys, employ a narrow stretch zigzag (length 2.5 mm, width 0.5–1.0 mm) so stitches yield with the knit stretch rather than bunching.
Always stitch a 10 cm test seam on a double scrap of the exact fabric cut in the same grainline direction before assembling your garment. A balanced seam should lie completely flat straight off the machine before any steam pressing is applied.
Sew with Joy Using Precision Patterns!
Browse the Vykroyka catalog for professional digital sewing patterns featuring detailed illustrated construction guides.
Explore Pattern Catalog