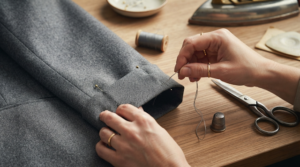
The set-in sleeve is universally recognized as one of the most technically demanding operations in garment construction. Even seasoned tailors can struggle when a seemingly well-fitted bodice produces puckering around the armscye, an unsightly puffed peak atop the sleeve cap, or restrictive tension whenever the arm moves. Flawless sleeve insertion does not depend on guesswork—it requires strict mathematical and engineering alignment between two opposing curves: the bodice armhole and the sleeve cap perimeter. At vykroyka.com.ua, we explore the geometry, ease ratios, and pressing techniques required for a smooth, ripple-free set-in sleeve.
1. Alignment Geometry: Armhole Length vs. Sleeve Cap Perimeter
Prior to pinning or basting, verification of seam lengths using the pattern pieces is essential:
The Rule of Cap Ease: The circumference curve of the sleeve cap must always exceed the total armhole circumference of the front and back bodice. This calculated surplus—known as cap ease—ensures the sleeve drapes organically over the shoulder joint without horizontal stress pulls or collapsing inward.
Standard Cap Ease Ratios:
- Lightweight Shirting and Silk: Requires minimal ease, typically 0.8–1.5 cm across the entire cap perimeter;
- Wool Suiting: Demands 2.0–2.8 cm of ease to produce a well-sculpted, tailored head;
- Heavy Coating and Structured Blazers: Ease ranges from 2.5–3.5 cm, as thick wools require extensive steam molding over shoulder pads.
2. Critical Matching Notches: Where Shift Is Not Permitted
To guarantee the sleeve hangs perpendicularly without twisting along its plumb line, align four indispensable registration points:
- Cap Apex (Highest Point): Must match the shoulder seam precisely (or the drafted shoulder pivot if styled off-shoulder);
- Front Balance Notch: Corresponds with the front armhole registration mark (usually 5 cm above the underarm);
- Back Balance Notch: Aligns with the back armhole notch (positioned higher to accommodate scapular movement);
- Underarm Base: The sleeve underarm seam and bodice side seam must intersect seamlessly at the armpit.
3. Eliminating Sleeve Puffing and Gathering Puckers
If an undesirable gathered ridge or peak appears at the shoulder after stitching, ease has been distributed incorrectly across the cap:
A. Strategic Ease Zoning
A frequent error is clustering all cap fullness directly on top of the shoulder. In reality, the 3 cm directly spanning the shoulder seam must have virtually zero ease. Approximately 70% of the ease must be positioned along the front and rear diagonal quadrants of the cap, where bias fibers readily mold to the curvature of the deltoid.
B. Pre-Insertion Steam Shrinking (Ease Basting)
Tailored fabrics (wool flannel, melton, tweed) cannot be eased in by stitch tension alone. Run two parallel rows of long basting stitches (4 mm) through the cap seam allowance between notches. Draw up the threads to match the armhole measurement, then steam-press the gathered allowance over a curved tailor's ham until all rippling disappears before stitching the sleeve into the garment.
When steam-shrinking cap ease, keep the iron's toe within 1.5–2 cm of the raw cut edge. Avoid pressing deep into the body of the sleeve cap, preserving its rounded three-dimensional dome.
Rigorous drafting geometry and disciplined pressing create tailoring of couture standard. Find more masterclasses, fitting guides, and precision digital patterns at vykroyka.com.ua.
Sew Structured Garments with Flawless Sleeve Fit!
All Vykroyka jackets, coats, and dresses are engineered with mathematically balanced armholes and precision notches.
VIEW PATTERNS →