
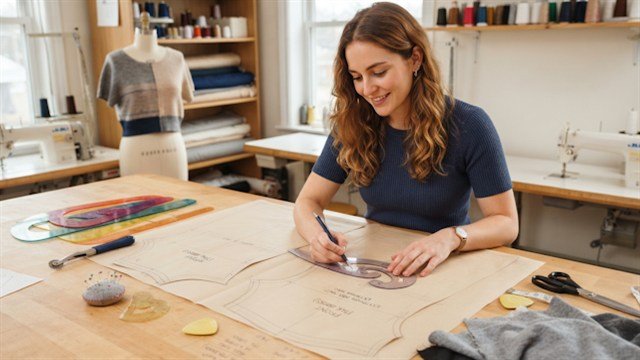
A fitted knit dress is a versatile foundation of any modern wardrobe. It drapes naturally, highlights body contours, and delivers supreme everyday comfort. Drafting a custom dress pattern from scratch using traditional geometry can be time-consuming, but transforming a proven turtleneck or t-shirt sloper into a tailored dress takes just minutes. In this masterclass, we explore pattern modification principles from negative ease calculation to hip curvature and kick pleat integration.
Subscribe to our official YouTube channel for more practical pattern cutting, fitting secrets, and garment sewing guides!
- Required Pattern Drafting Tools
- Step 1. Evaluating Sloper Ease & Knit Stretch
- Step 2. Extending Guidelines to Waist & Hip Levels
- Step 3. Shaping the Waist Curve
- Step 4. Hip Contouring & Hem Tapering
- Step 5. Adding a Walking Vent or Slit
- Step 6. Adjusting Neckline and Sleeves
- Step 7. Seam Trueing & Allowances
- Patternmaker's Pro Tips
Required Pattern Drafting Tools
- Basic tested turtleneck or t-shirt sloper;
- Tracing paper or pattern drafting kraft paper (1.5 m);
- French curve ruler and 100 cm transparent straight ruler;
- Measuring tape, mechanical pencil, masking tape, and tracing wheel.
Step 1. Evaluating Sloper Ease & Knit Stretch
Check the stretch percentage of your fabric. Highly elastic rib knits can handle negative ease (-2 to -4 cm), whereas stable ponte de roma or heavier jersey requires 0 to +2 cm ease at the bust and hips.
Step 2. Extending Guidelines to Waist & Hip Levels
Trace the front and back bodice slopers. Extend the center front and back grainlines downwards. Mark the waistline, hip level (19–21 cm below waist), and hemline.
Step 3. Shaping the Waist Curve
Indent the side seam by 1.5–2.5 cm at the waistline. Connect from underarm to waist with a soft, gradual curve.
Step 4. Hip Contouring & Hem Tapering
Calculate quarter-hip measurements: (Hip Circumference + Ease) / 4. Use a French curve to sketch smooth hip arcs, then taper the side seams inward by 1.5–3 cm toward the hem for a pencil silhouette.
Step 5. Adding a Walking Vent or Slit
A fitted knit dress requires a walking vent or side slit below the knee. Add a 3 cm folded hem extension or a 4 cm center-back vent.
Step 6. Adjusting Neckline and Sleeves
Lower the neckline if designing a scoop neck instead of a high neck. Check wrist circumferences and sleeve length.
Step 7. Seam Trueing & Allowances
Align side seams of front and back to ensure lengths match precisely. Add 7 mm serger allowances and 2.5–3 cm hem allowance.
Sew figure-flattering dresses with expert digital patterns!
Browse the Vykroyka catalog for professionally engineered sewing patterns of turtleneck dresses, wrap dresses, and casual knitwear.
Browse Pattern Catalog
Apparel Industry Hub in Telegram
Community of garment manufacturers, tailors and designers. Daily fresh workshop vacancies, verified factories database and direct contacts.





