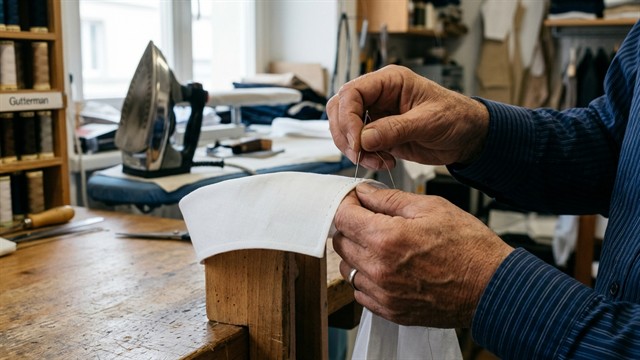
A neat stand-up collar is the central element of men's shirts, women's blouses and shirt dresses. It is the sharpness of the corners, the evenness of the finishing stitches and the absence of creases on the stand that give away the class of the product. In this article, we will reveal the couture secrets of tailoring: from proper duplication and the use of glueless technologies to jewelry turning out the corners and cleanly sewing the stand into the neckline.
Contents of the article
- Anatomy and preparation of parts for a stand-up collar
- Secrets of duplication and glueless fixation of ledges
- Step 1. Assembling the collar flap and perfect sharp corners
- Step 2. Connecting the flap to the collar stand
- Step 3. Sewing the stand into the neckline: glueless couture method
- Tailor's advice: thread method of turning corners
- Frequently asked questions (FAQ)
Anatomy and preparation of parts of a stand-up collar
The classic stand collar consists of four key parts:
- Upper collar (flap):The visible part that folds back. The lower collar is cut 1-2mm larger along the outer contour to create a wrap-around fit.
- Bottom Collar:The part facing the garment that the top collar “bends around” to.
- Inner post:The part that fits the neck.
- External stand:The part visible from the front of the product.
Secrets of duplication and glueless fixation of ledges
To create a rigid male-type collar, a thick cotton-based collar duplerin is used. In women's dresses and blouses made of silk or viscose, glue-free technologies are used (using organdy, voile or thick calico liner without glue) to avoid stiffness and maintain plasticity.
Important duplication rule: Only the upper collar and the outer stand are cut out using collar duplicating material WITHOUT seam allowances (the adhesive layer ends strictly on the stitching line). This eliminates excess thickness from the seams.
Step 1. Assembling the collar flap and perfect sharp corners
- Fold the top and bottom collars right sides together, aligning the edges. At the curves and corners, lightly press the top collar.
- Stitch the flap from the side of the lower collar with a seam 5–7 mm wide. In the corners themselves, make one transverse stitch (the stitch length on the machine in the corner area is reduced to 1.5 mm).
- Cut off the allowances in the corners, not reaching the line 1.5–2 mm. For long cuts, trim the bottom collar allowance to 3 mm (step trimming).
- Turn the collar inside out, straighten the corners and sweep a 1 mm wide edge from the upper collar towards the lower one. Steam and add finishing stitch.
Step 2. Connecting the flap to the collar stand
Iron the bottom seam allowance of the outer stand to the wrong side by 7–10 mm (along the line of sewing into the neckline). Fold the outer and inner posts with the right sides facing inward, placing the finished collar flap between them. Align the notches of the center and edges. Sew along the contour of the stand, smoothly rounding the ledges.
Step 3. Sewing the stand into the neckline: glueless couture method
- Place the inner (non-duplicated) stand with the right side to the wrong side of the neck of the product, aligning the reference points and notches.
- Sew the stand on the collar side. Cut seam allowances to 5 mm, make cuts at the rounded neckline.
- Iron the seam allowances inside the post. Cover the seam with the folded edge of the outer post by 1 mm, overlapping the stitching line.
- Secure with pins and stitch to the edge (1 mm from the fold) along the outer post, while hemming the inner seam.
Tailor's advice
Never straighten the corners of a collar with scissors or a seam ripper - you risk piercing the fabric. Use thread pull: when approaching the very corner, 1 stitch before the edge, insert a strong thread folded in half between the collar parts with the loop inside. Make 1 diagonal stitch, bring the ends of the thread inside and complete the seam. After trimming the seam allowances, simply pull the ends of the thread outward - the corner will turn out perfectly! And proven ready-made patterns from our catalog will help you sew dresses and shirts with a perfect fit.
Frequently asked questions (FAQ)
Why does the collar stand tighten the neck or puff up?
This occurs due to the incorrect length of the stand in relation to the neckline or the absence of cuts on the neckline allowances. Always check the lengths according to the patterns before cutting.
Do I need to duplicate both parts of the rack?
In classical technology, only one rack (external) is duplicated. If you duplicate both parts, the stand will become a stake, putting pressure on the neck and creating creases when moving.
How to achieve equal roundings on the ledges of the rack?
Use a rigid template made of thin plastic or cardboard with a marked radius. Mark the stitch line with a soap or a disappearing marker strictly according to the template.
Expertly designed patterns are the key to a perfect fit of any product. To be the first to learn about the intricacies of design, modeling and trends in the sewing world, subscribe to our video channel Pattern - Ready-made patterns.