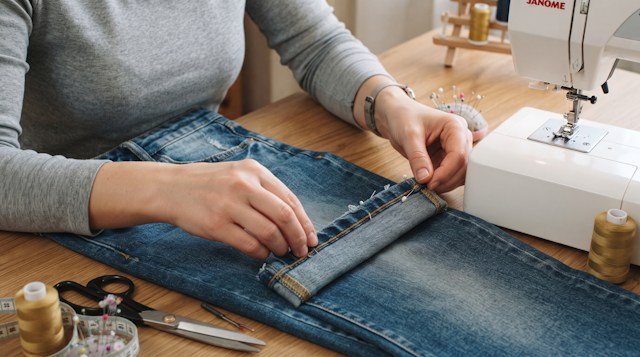
Purchasing a new pair of jeans almost invariably involves length adjustments. However, traditional hemming methods that chop off the bottom edge destroy the authentic vintage character of denim: the factory distressing, ropey honeycombed seams, and stone-washed edges are lost. Here is the professional tailor's technique to shorten jeans to your exact inseam while preserving the original factory distressed hem.
- Jeans requiring length alteration;
- Tailor's pins, fine tailor's chalk or marker, measuring tape;
- Matching thread (heavy-duty bonded polyester) and dedicated denim needles (Jeans size 90/14 or 100/16);
- Sewing machine fitted with a narrow zipper foot;
- Steam iron and a wooden tailor's clapper.
Step 1. Accurate Inseam Measurement
Always pre-wash or steam-press the denim hem before marking, as cotton denim can shrink slightly upon initial laundering:
- Put on the jeans with the shoes you plan to wear most frequently. Stand upright in front of a mirror;
- Fold the original hem up to the desired length and secure with pins around the leg opening;
- Measure the exact length reduction required from the original bottom edge to your new fold line (e.g., 4 cm / 1.5 in);
- Golden Rule: The factory hem band is typically about 1 cm (3/8 in) wide. We calculate the tuck carefully so the finished edge aligns perfectly with your desired inseam.
Step 2. Forming the Internal Tuck
Lay one pant leg flat on your cutting table with the front side facing up:
- Divide the total shortening amount by two. For instance, if you need to remove 4 cm, your tuck width will be exactly 2 cm (3/4 in);
- Fold the original hem up onto the right side of the pant leg so the distance between the new fold and the factory stitching equals half the shortening amount;
- Carefully align both the inseam and outseam lines to avoid twisted legs;
- Pin the horizontal tuck securely around the entire circumference with pins perpendicular to the seam.
Before sewing, verify that flat-felled side seams line up precisely. If the denim seams are bulky, gently tap them with a wooden mallet or clapper through a cloth. This flattens the layered fibers and prevents skipped stitches or needle breakage.
Step 3. Stitching with a Zipper Foot
A standard presser foot cannot get close enough to the bulky factory hem. Install a narrow zipper foot:
- Place the leg under the foot so the edge of the zipper foot rides snugly against the factory hem roll;
- Stitch with a 2.5–3.0 mm stitch length just 1 mm outside the factory stitching line into the fold;
- At bulky seam intersections, sew at low speed and advance the machine by manually turning the handwheel if necessary;
- Flip the original hem down and inspect from the right side: the authentic washed hem should hang naturally, hiding your join line beneath the factory crease.
Step 4. Trimming, Overlocking, and Steam Pressing
To eliminate bulk inside the pant leg, trim and serge the folded excess:
- Trim away the excess fabric tuck with sharp shears, leaving a 1–1.2 cm (1/2 in) seam allowance;
- Finish the raw edge using a serger or tight zigzag stitch;
- Press the serged allowance upward toward the waistband, and steam the factory hem downward;
- Steam-press firmly with a press cloth and clamp with a wooden tailor's clapper for 10–15 seconds to set an ultra-flat finish.
Looking for Professional Denim & Trouser Patterns?
Browse our pattern library featuring classic denim jeans, cargo trousers, and denim jackets engineered with calibrated ease.
Browse Pattern Catalog