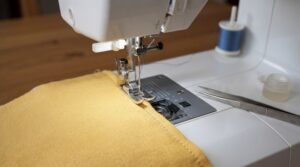
A sudden sewing machine jam and the formation of a tight thread nest inside the shuttle hook compartment is an unpleasant issue every maker encounters sooner or later. The machine abruptly lets out a dull thud, comes to a dead stop, and the handwheel locks up completely. In this guide, we walk through how to safely and cleanly remove jammed thread from the shuttle hook without damaging delicate components, restoring effortless, smooth stitching.
Essential Tools for the Job
To safely extract tangled thread fibers and clean the shuttle compartment, gather these basic tools:
- Small screwdriver (flathead or Phillips from your machine's standard accessory pack to remove the throat plate);
- Fine embroidery scissors (snips or stork scissors) or a sharp seam ripper;
- Tweezers (curved or straight precision tweezers to grab short thread ends);
- Lint brush or small bristle paintbrush to sweep away compacted fiber dust;
- Sewing machine oil (pure mineral/white paraffin oil for moving metal components).
Step 1. Power Off and Safe Needle Lift
Safety comes first. Immediately turn off the machine power switch and unplug the power cord from the wall outlet to eliminate any chance of accidental motor engagement via the foot pedal.
Raise the presser foot and detach it from the ankle. Turning the handwheel strictly toward yourself (counterclockwise), bring the needle to its highest upward position. If the handwheel is frozen solid by the knot, never force it! Loosen the needle clamp screw and carefully pull the needle upward or snip the thread above it to protect the needle bar from bending.
Step 2. Removing the Needle Plate
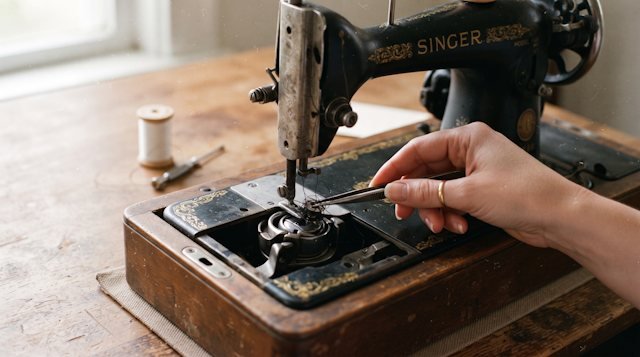
Remove the extension table or free-arm accessory box. Using your small screwdriver, remove the retaining screws holding the metal throat plate and lift the plate off. This provides clear access to the feed dog teeth and the inner hook mechanism.
Step 3. Disassembling the Shuttle Hook
Disassembly steps depend on your machine's hook type:
- Top-Loading (Drop-In / Horizontal) Hook: remove the clear slide cover, take out the bobbin, and gently lift out the black plastic bobbin basket (rotary hook case);
- Front-Loading (Oscillating / Vertical) Hook: open the hinged shuttle cover and pull out the metal bobbin case. Flip aside the two retaining brackets (shuttle race latches), remove the outer retaining ring, and carefully slide out the hook half-moon.
Step 4. Removing Tangled Threads and Deep Cleaning
Using fine scissors or a seam ripper, carefully snip through the tangled loops. Never yank or jerk jammed threads with brute force, as this can burr delicate raceways or throw off hook timing.
Using tweezers, pick out all thread shreds from grooves, race channels, and beneath the feed dog teeth. Thoroughly sweep away compacted lint and fuzz with your dry brush. Apply a single tiny drop of sewing machine oil to the outer race groove of an oscillating vertical hook (drop-in polymer hooks typically do not require race lubrication).
When a jam occurs, never turn the handwheel backwards (away from you). Turning it backwards wedges the bunched thread loops deeper around the hook axle and risks throwing off the precise synchronization between the hook point and needle eye.
Step 5. Reassembly and Test Stitch
Reassemble the shuttle assembly in exact reverse order:
- Reinstall the hook and retaining ring, snapping the side latches closed (for vertical hooks), or reseat the bobbin case against its stopper bracket alignment mark (for drop-in hooks);
- Reattach the needle plate and tighten the screws firmly;
- Insert a brand-new needle (the old one may have deflected or dulled during the jam), flat side facing back, and clamp the screw;
- Rethread both top and bobbin threads according to the manual diagram;
- Manually turn the handwheel 2 to 3 full rotations toward yourself to ensure quiet, smooth motion, then power on the machine and sew a test seam on scrap fabric.
Helpful Tip: How to Prevent Future Thread Jams
To prevent thread from snarling into the shuttle, make it an unbreakable habit: whenever beginning a new seam, gently hold both upper and bobbin thread tails behind the presser foot for the first 2 to 3 needle penetrations. This prevents the initial thread slack from being drawn down into the hook raceway.
Sew with Joy Using Precision Patterns!
Browse the Vykroyka catalog for professional digital sewing patterns featuring detailed illustrated construction guides.
Explore Pattern Catalog