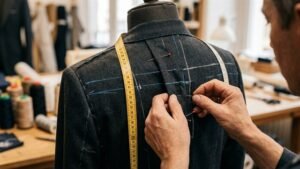
Transitioning physical paper pattern blocks into clean digital vectors represents an immense milestone for modern patternmakers, bespoke tailoring ateliers, and apparel brand founders. There is no longer a need to stockpile fragile paper rolls, brittle tracing tracing paper, or risk ruining master prototypes. Digitized vector patterns enable instantaneous size grading, effortless client sharing, and direct transmission to commercial wide-format plotters. On the sewing portal vykroyka.com.ua, we have curated an exhaustive technical guide on how to digitize pattern slopers into precision vector files with less than 1 mm tolerance.
1. Essential Hardware and Software for Pattern Digitization
Pattern digitization is an optical-geometric calibration process requiring systematic elimination of lens distortion:
- Optical Capture Gear:
- Wide-Format Flatbed Scanner: distortion-free optical capture;
- Smartphone or DSLR Camera: mount securely on a tripod plumb to the cutting table to avoid angular perspective parallax.
- Test Calibration Benchmark: draft an exacting 100 × 100 mm (10 × 10 cm) calibration test square onto every master paper panel and lay a rigid stainless-steel ruler adjacent;
- Vector Illustration Software: Adobe Illustrator, CorelDRAW, or open-source Inkscape (rendering mathematical Bézier curves in millimeter-accurate coordinate units);
- Base Drafting Blueprint: ensure your base drafts are trued (e.g. drafted via our basic pattern sloper guide or scaled via pattern grading techniques).
2. Step-by-Step Workflow: From Photograph to Vector Paths
Execute vector digitization systematically across four rigorous phases:
Step 1. Perspective-Free Optical Acquisition
Tape master papers flat against an even workbench. Capture photographs from at least 1.5 to 2 meters elevation at a focal length ≥50 mm to negate barrel distortion. Ensure uniform, diffused illumination.
Step 2. Workspace Setup & Precision Calibration
Open Illustrator or CorelDRAW, setting document dimensions in millimeters (e.g., A0: 841 × 1189 mm or custom 914 mm plotter roll width). Import the raw photograph onto a dedicated background layer:
- Draft a true vector test square measuring exactly 100 × 100 mm;
- Scale the photograph uniformly (holding Shift) until the captured physical square aligns seamlessly with the 100 mm vector box;
- Lock the background layer to prevent accidental displacement.
Step 3. Vector Tracing with Bézier Curves
Establish a fresh «Contours» drawing layer. Select the Pen Tool with a crisp 0.25–0.5 pt stroke in high-contrast blue or magenta:
- Anchor straight seamlines (center front, straight side seams) with corner anchor points;
- Trace curved armscyes, necklines, and sleeve caps using minimal smooth anchor points, extending tangent handles along contour curvatures;
- Vectorize critical inner markings: dart tips (including dart manipulation pivots), alignment notches, waist baselines, and grainline arrows.
3. Digital Seam Truing, Grainlines, and Pattern Notches
Hide background raster layers and conduct a thorough technical verification:
- Seam Truing: measure matching seam lengths (front and back shoulder seams must match; sleeve cap perimeter must maintain 3–4 cm ease allowance over the armhole);
- Labeling & Annotations: add grainline directional arrows, piece names («Front», «Back», «Sleeve»), cut quantity specifications, and seam allowances;
- Scale Test Box: retain the 100 × 100 mm calibration test square prominently annotated for print-shop verification.
4. Exporting to 1:1 Scale Vector PDF for Wide-Format Plotters
Ensure seamless printing by following prepress PDF standards:
- Execute
File -> Save As -> Adobe PDF; - Select the High Quality Print or PDF/X-1a:2001 standard preset;
- Under compression settings, disable downsampling for vector path data;
- Instruct print shop technicians: «Print at 100% custom scale strictly; do not fit or shrink to printable page boundaries».
Place Bézier curve anchor points precisely at local mathematical inflection points (apex of sleeve cap, deepest underarm hollow). This prevents microscopic waviness and produces ultra-smooth contour lines on digital plotter cutting blades.
Discover more cutting-edge tailoring masterclasses, pattern drafting blueprints, and digital pattern blocks on the vykroyka.com.ua sewing hub.
Download Precision Vector Patterns!
All Vykroyka digital sewing patterns are expertly drafted in vector format and optimized for instant 1:1 printing on wide plotters and standard A4 home printers.
Explore Pattern Catalog