Processing a jacket-type turn-down collar with lapels is one of the most important stages in the creation of jackets, blazers and classic coats. An impeccable rise, a beautiful fit of the stand and a soft, smoothly folding lapel ledge form the front part of the product. In this master class we will examine in detail the correct duplication technology, assembly of the lower and upper collar, as well as the secrets of shaping wet-heat treatment (WHT).
Contents of the article
Fit details and node duplication rules
A jacket collar consists of a lower collar (usually with a seam in the middle) and an upper collar. To ensure shape and durability, duplication with adhesive materials of different densities is used.
- Lower collar: Cut out strictly at an angle of 45° to the warp thread (on the bias) and duplicated with thick coat or suit dubbing. This ensures plasticity and good dimensional stability of the stand.
- Upper collar: It is cut out with a grain of thread along the edge and duplicated with a softer, thinner doubler, so as not to weigh down the edge.
- Heading and lapel:The lapel area on the hem and front is necessarily duplicated by laying an adhesive or thread-stitched edge along the lapel roll line.
Preparation and WTO of the lower collar to create a stand
Before connecting the parts, the lower collar is subjected to a form-building WTO. Sew the middle seam of the lower collar, press the seam allowances and trim them to 0.5 cm.
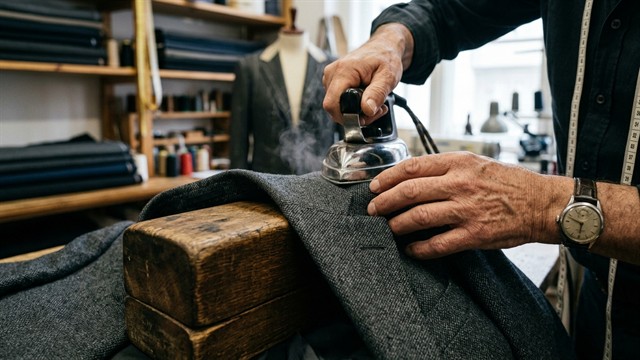
Fold the lower collar along the line of the stand and use an iron with steam to give it an arched shape:the stand is pulled back and the flyaway is ironed. After this treatment, the collar takes on an anatomical shape and will fit perfectly to the neck.
Assembling the collar and processing the opening
The split is the seam that connects the split edge of the lapel to the end of the collar.
- Connecting the collar with the neck: The lower collar is sewn into the neck of the product, and the upper collar is sewn into the neck of the collar.
- Flight stitching:The upper and lower collars are folded right sides together. When stitching, the top collar is given a slight fit at the corners and along the flap to create a beautiful edging.
- Processing the lapel ledges: The stitching is laid strictly up to the opening point, the allowances in the corners are cut off diagonally, not reaching the stitching by 1.5–2 mm.
Forming a roll and basting lapels
Turn the collar and lapels right side out and carefully straighten the corners with a peg. Along the edge of the collar, sweep a 1-2 mm wide landing edge from the upper collar towards the lower collar.
In the lapel area, the edging is formed in the opposite direction - from from the hem to the front side, since when the lapel is folded, the hem appears on the front side. Iron the edge using a steam iron and let the fabric cool completely on the block.
Tailor's advice
In order for the lapel to softly and beautifully bend onto the shelf without creases, laythe lapel or edge along the lapel roll linewith a slight tension (0.5–0.7 cm shorter than the line on the pattern). This will fix the shape and prevent the lapel from stretching during wear. Tested ready-made patterns from our catalog will help you calculate the fit allowances and find the ideal angle.
Frequently asked questions (FAQ)
Why is the lower collar cut in two parts on the bias?
The cut at an angle of 45° allows you to easily give the collar a voluminous arched shape using the WTO and ensures a perfect fit of the stand to the neck.
What to do if the corners of the collar puff up?
This is due to a lack of fit at the top collar or thick seam allowances at the corners. Turn the collar inside out, trim the seam allowances in steps (unstitch) and cut off the excess fabric in the very corner.
How to fix the lapel roll line after sewing?
Iron the lapel along the rolled line on a special tailor's block (rolling it slightly onto the shelf) and fix it with a dry wooden iron-press until the fabric cools completely.
Expertly designed patterns are the key to a perfect fit of any product. To be the first to learn about the intricacies of design, modeling and trends in the sewing world, subscribe to our video channel Pattern - Ready-made patterns.