
Shortening a new pair of jeans is one of the most frequent alterations in tailoring. However, standard turn-and-stitch hemming cuts away the signature stone-washed distressing, contrast topstitching, and roping effect that give denim its authentic factory character.
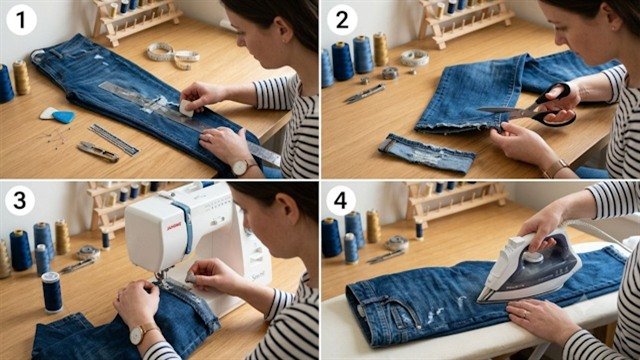
How do professional tailor shops hem jeans while preserving the original distressed factory hem using a standard home sewing machine? Let''s walk through the exact step-by-step masterclass.
Tools and Materials Needed
- Jeans that need shortening.
- Tailor''s pins, measuring tape, tailor''s chalk, and sharp fabric shears.
- Matching thread for the denim wash and heavy jeans topstitch thread.
- Sewing machine equipped with a Jeans/Denim needle (size 100/16 or 110/18) and a zipper presser foot.
Step-by-Step Alteration Guide
Step 1. Precise Measurement and Pinning
- Try on the jeans wearing the shoes you intend to pair them with (sneakers, boots, or heels).
- Fold the hem inward to your desired length (typically touching the top of the shoe with a subtle break) and secure with pins.
- Measure the exact amount of excess length to remove (for example, 2 inches / 5 cm).
Step 2. Measuring and Cutting
Measure the height of the original factory hem (typically 1/2 inch / 1.2–1.5 cm):
- Measure up from the original hem edge by the shortening amount minus the hem height, and draw a chalk guideline.
- Add a 3/8-inch (1 cm) seam allowance and cut off the excess pant leg length.
- From the detached lower cuff, cut away the excess denim, leaving a matching 3/8-inch (1 cm) seam allowance above the original stitched hem.
Step 3. Aligning and Pinning
Place the cut original hem cuff and the shortened jeans leg right sides together:
- Carefully match both the flat-felled inseams and the outseams so the denim grain and wash lines align perfectly.
- Pin all around the circumference perpendicular to the raw edges.
Step 4. Stitching in the Groove
Attach your zipper foot to the sewing machine:
- Stitch directly alongside the thick original factory hem ridge. The narrow zipper foot allows the needle to sew extremely close to the existing rolled hem.
- Trim the internal seam allowances down to 1/4 inch to eliminate bulk around the ankle.
- Serge or zigzag overcast the raw edges together.
- Press the seam allowances upward inside the leg and set with steam. Tack the seam allowances flat at the side seams with a couple of hand stitches.
Tailoring Pro Tips
- Hammer heavy side seams: gently tap bulky seam intersections with a wooden mallet or clapper before sewing to compress the dense denim layers and avoid breaking needles.
- Final steam pressing: apply generous steam with your iron over a tailor''s ham. The original distressed edge will snap flush into place, rendering the alteration virtually undetectable!





